As for the filing system - all the recipes are being housed in a magnetic closure binder with two recipes to a page protector. I purchased these colorful Avery Big Tab Folder Dividers. One side of the folder holds potential new recipes that I have found and the other side holds recipes I have tried, liked, and have reformatted. I really like my new system. Only thing that makes me sad - is the pathetic white binder it is all in. For now though, it works and it makes finding my favorite recipes a heck of a lot easier.
Cookbook
As for the filing system - all the recipes are being housed in a magnetic closure binder with two recipes to a page protector. I purchased these colorful Avery Big Tab Folder Dividers. One side of the folder holds potential new recipes that I have found and the other side holds recipes I have tried, liked, and have reformatted. I really like my new system. Only thing that makes me sad - is the pathetic white binder it is all in. For now though, it works and it makes finding my favorite recipes a heck of a lot easier.
Sweet Potatoes
It has been 5 days with no allergic reaction to the apples. So, I feel it is safe to move on to the sweet potatoes I had prepared. This time I was ready - I got out my little flipvideo hd video camera to capture JT's response.
I suppose the reaction is not nearly as shocking as the apples. The sweet potatoes were nice and sweet but not even close to the apples on the sweetness scale. Since they (potatoes) are not very juicy like apples, I had to offer a bottle of water along with this meal. JT did very well with it.
Mental note - if we ever have another child, I think it would be better to start with sweet potatoes first. Then move to the apples. No, there are no thoughts of adding another to the brood. JT is more than a handful for me.
I think I will be taking more videos in the future. JT is doing a lot more squirming so regular still shots are becoming more difficult. Enjoy your weekend!
An Apple A Day...
This past Monday (Presidents Day) we embarked on this wonderful food journey. For the past two weeks, we were enjoying our rice cereal prior to our lunchtime (noon) feeding. On Monday, we pushed the cereal to right before our breakfast bottle - how apropos? Cereal for breakfast. For lunch, we dived right in to our first "real" food - the homemade apples. I warmed up two apple "ice cubes" which is equivalent to about an ounce and a half of apples.
Homemade Baby Foods
So, I spent part of this wonderfully long weekend trying my hand at homemade baby food. The first thing I needed to do was determine what would be good to try. I had ordered a couple of books from Amazon and they all came to same general consensus. All had apples, sweet potatoes, bananas, and peas as good first foods.
So it was off to the grocery store to pick up what I could find. Now, I will be totally honest. I feel weird in the produce section. Stick me in the pasta/soup aisle and I am snug as a bug in a rug. Produce though - weird.
It probably comes from a long standing aversion to fruits and vegetables. I do not like the texture of many fruits and vegetables. It has taken me a very long time to become okay with things like - broccoli, sweet potatoes, even beans. Notice I did not mention any fruits - I still can not do fruits. Fruit juice, I can barely stomach. Fruits are a scary animal.
So I felt like a fish out of water in the produce section, picking out food that I can barely stomach but know would be the best things for my little boy. I picked up a bunch of apples, a very large sweet potato, and some bananas (although I think the bananas may be eaten by the hubby before I get to smushing them up).
So I got to cooking my baby food. I started with the apples. I initially intended to steam all the fruits and veggies. When it came right down to it, the microwave is here for a reason. I just popped the apples (golden delicious) in for a few minutes until they became tender. I then stuck them in my blender along with about a 1/4 cup of water. Hit puree and let the blender do it's work. In fact, I didn't even leave it on that long. I have found that JT loves his cereal to be on the considerably lumpy side - so the apples were a bit lumpy. Three apples were enough to fill my special baby food ice cube trays.
I cleaned everything to prevent cross contamination and got started on the sweet potato. Ugh! The directions said to peel and chop the little son of a gun. Never again. Sweet potatoes are tubers that do not like being cut. If John really enjoys it, I will probably try to cook it skin and all in the microwave, then scoop out the yummy insides while it is still hot. I added about 3/4 a cup of water to the blender for the sweet potato puree.
Don't they look so pretty. I am impressed with how easy it is. You just need a little bit of time and patience. Voila! I have baby food for the next week or so. Hopefully JT will enjoy them.
Next up - pears, peas, bananas, avocados, and carrots!
Valentine's Day Dinner
| Oooo, Roses! |
½ cup mayonnaise
1 ½ tbsp. garlic, minced
¼ cup parmesan cheese
4 - 6 tbsp. lemon juice
½ - 1 tbsp. Italian seasoning
4 - 6 tilapia filets, thawed or frozen
1 bundle asparagus
4 - 6 foil, about 12 inches in length
1 box wild rice, cooked
1 cup water, warm
1 tsp. active dry yeast
1 tbsp. sugar
2 cups flour
1 tsp. salt
peanut oil
confectioners' sugar
Mr. Grabby Hands
Strombolis
Pizza dough
flour, for dusting
1 ball mozzarella cheese, sliced
1 cup filling, of each pepperoni, sausage, ham, olives, onions, whatever
olive oil, for brushing
sauce, for dipping
Steps:
1. Prep all filling ingredients.
2. Dust surface with flour and transfer dough to surface. Cut dough in half.
3. Roll out the dough into a rectangular shape - around 11 by 14 inches. The dough should be about 1/8 to 1/4 of an inch thick. Do this for both pieces of dough.
4. Cover the dough rectangle with your cheese and then your fillings. Make sure to leave a 1 inch border on all sides.
5. Evenly roll the stromboli from bottom to top. Pinch the seam tightly with closed fingers. Pinch the two ends closed and tuck them under the loaf. Carefully lift the loaf and place them seam side down on a parchment lined baking sheet. Brush the loaves with olive oil and cover the pan with plastic wrap.
6. Let the stromboli sit for 1 1/2 hours. The dough will be showing signs of wanting to rise.
7. Heat oven to 400 degrees. Brush the dough with olive oil and lightly sprinkle with salt. Cut 3 or 4 steam vents in each stromboli to release any air. Bake 20 - 30 minutes until crust turns golden. Rotate the pan after the first 10 minutes for even baking. Let cool for 5 minutes before serving.
The final product:
This recipe made two strombolis and perfect dinner size for the hubby and I. As you can see I had a bit of seep-age occur. I think that was because I cut really big vent slices. I won't do that again. I ended up leaving them in the oven for 25 minutes but next time I think it will stay in the oven the full 30 minutes. It was a bit work intensive to roll out the dough but cold dough is easier to work with compared to fresh warm dough.
As for taste, totally yummy! I used the mozzarella cheese, leftover meaty spaghetti sauce, and some pepperoni. But really I think you could put almost anything inside - I thought it might be interesting to do one with cheese, pesto sauce, and cooked shredded chicken. Maybe next time.
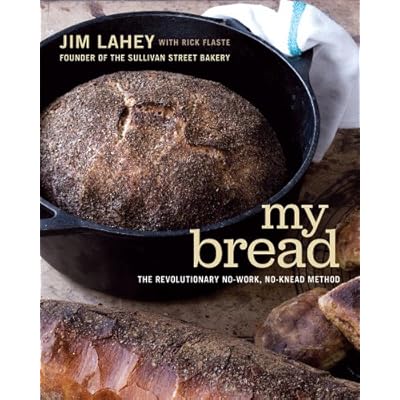
As for the pizza dough, I make a fresh batch following the instructions in My Bread: The Revolutionary No-Work, No-Knead Method.
The batch produces dough for two pizzas - which I freeze. So this dough would produce about 4 adult sized strombolis. One could probably go a bit smaller in size and make a bunch from one batch - somewhat like Hot Pocket sized. Probably a bit healthier than a Hot Pocket though.
Enjoy!
Slow Cooker Mac and Cheese
1 lb. ground beef
½ lb. pasta, fusili, campanelle, good twisty pasta to capture the cheese
16 oz. Velveeta cheese, cubed
1 cup shredded six cheese mix
handful pecorino romano, grated
2 eggs, large, lightly beaten
12 oz. evaporated milk, (1 can)
1 ½ cups milk
1 tsp. salt
½ tsp. pepper
½ tsp. Worcestershire sauce
Steps
1. Brown the ground beef and place in slow cooker.
2. Mix together evaporated milk, milk, and eggs.
3. Combine cheese, pasta, milk/egg mixture, salt, pepper, Worcestershire, and beef in slow cooker. Mix well.
4. Cover and cook on High for 1 hours, stirring occasionally (I did once every 15 - 20 minutes). Reduce heat to Low and cook for another 30 minutes (more stirring here).
My apologies for not providing a picture. It was quite yummy. It was good enough for the hubby to say - keep this one! Good enough for me to no longer have my mac and cheese/ hamburger helper craving. I know it isn't a traditionally long cooking slow cooker recipe but I think the melting cheese makes the long cooking time nearly impossible. Since my slow cooker has a non stick insert I did not have and issue with cheese hardening on the side. But if I was using my old crockpot I would definitely advise spraying the sides with PAM or rubbing the insert with butter before cooking.
Foodie Love
Fortunately, Suzy teaches English, so she is infinitely better equipped to describe this feeling then I am. So check out what she wrote on her blog: BurghBytes.
Favorite Time of Day
A Note on Rear Detachment
There were three reasons for my lack of posts during 2011 - my hubby came home at the end of 2010 (which I wanted to savor), we got pregnant (I got a little hormonal on more than one occasion), and the hubby took command of a rear detachment unit.
Rear Detachment is one helluva beast. It really is a job that no one in the armed forces wants to do but someone has to do it. What is worse - while they call it a "command" it does not really count as "command" time. I would argue it is probably one of the most important "command" experiences out there - why you may ask? Oh, I shall enlighten you.
The mission of rear detachment is not that of a regular unit, which is primarily training for war. There are - I feel - three major missions for a rear detachment unit:
1. Protector of Property - anything, and I mean anything, that the deploying unit is not bringing with them to theatre is left behind. Someone needs to be in charge of all of that stuff, be it vehicles, guns, tools, or tents. It all needs to be inventoried and accounted for on a regular basis.
2. Supporter of Families - the rear detachment serves as the control point of information from the deployed unit to the families. This includes good information like "Hey, we are coming home early" and bad information, "We lost one (some) of our own today".
3. Arbitrator of UCMJ (Uniform Code of Military Justice) - just as the deploying unit gets to decide what "stuff" it is leaving behind...it also picks what soldiers it will bring into battle. That usually means that the less than savory soldiers are left behind. Rear detachment is there to get these unsavory types out of the armed forces.
What makes that any different from a regular unit? They have to do all those things too. Unfortunately, rear detachment is left severely understaffed to perform these missions. If units leave behind the "unsavory" characters, how can all of these missions be accomplished? A handful (and I am not saying this figuratively) of people are stuck juggling a ton of balls.
The reason I did not write during this time is that I felt it would be way to tempting to air "dirty laundry" so to speak. The stories could fill volumes and I did not think that was appropriate. But I will say that never thought my husband would have to become any of these things: travel agent, moving service, financial advisor, or marriage counselor. I have learned more than I could ever want to know about how the army keeps track of all of it's supplies, the inner workings of frg's and family communication, and pretty sure I could given a primer class on UCMJ and getting chaptered out of the army. There were many days that I wished that my husband had deployed because the schedule, workload, and personal involvement in other people's lives is more than one person should have to deal with. I just wish that he was given a little bit of credit for being personally vested in trying to make the army family better.
With that, I am off my tiny soap box. Sometimes I wish I was a little less ethical because I am sure more than half of the what happened this past year would make a fantastic and eye-opening book.
First Taste

I mixed one tablespoon of cereal with one scoop of formula and two ounces of warm water. To be honest, it didn't look that appetizing. I wouldn't want to eat it. Truth be told, I gave it a taste too. It seemed fairly sweet. I guess it was as good a time as any to give it a shot.
I suppose for first tastes it did not go over too badly. We had a couple of spoonfuls of the cereal. By "had" I mean "let it sit in our mouth while we chomped on the spoon then spit a bunch of it out once the spoon was removed." John was over the moon happy when this experience was over. He got his face cleaned up and maneuvered his thumb right into his mouth. I have a feeling the next couple of days (probably more like weeks) of this eating cereal will be slightly rough. But the bright side is I know JT watches our mouths while we eat dinner. So hopefully his little brain will make the connection soon. I can not wait to get him introduced to green beans and the like.
Slow Cooker Chicken Parisienne
Ingredients:6 skinless, boneless chicken breast halves
salt and pepper to taste
paprika to taste
½ cup dry white wine
1 (10.75 ounce) can condensed cream of mushroom soup
1 (4.5 ounce) can sliced mushrooms, drained
1 cup sour cream
¼ cup all-purpose flour
Steps:
1. Sprinkle chicken breasts lightly with salt, pepper, and paprika to taste. Place in slow cooker.
2. In a mixing bowl, combine the wine, condensed soup, and mushrooms. In another bowl, mix together sour cream and flour. Stir sour cream mixture into the mushrooms and wine.
3. Pour over chicken in slow cooker. Sprinkle with additional paprika, if desired. Cover, and cook on Low for 6 to 8 hours.
The final product:
This was absolutely fantastic. The last time I used wine in the slow cooker (Lamb Stew) we found that the alcohol left the stew with a weird tinny aftertaste. I was a little hesitant this time but there was no funny aftertaste. It reminded us of the favors of a beef stroganoff but considerably lighter due to the chicken. The paprika provided a great spiciness to the dish. Hubby said it could have used a little bit more but I thought it was just the right amount. As you can see from the picture, I thought it needed a little starch so I boiled up some egg noodles before it finished cooking. Definitely a keeper for my recipe book.
Speaking of which- I managed to get all of the recipes from my old program over to MacGourmet. That was big considering I had nearly 50 recipes there. I wish though that that meant I was done. Unfortunately, that means I need to search through the mound of recipes I have collected over the years that are held on random scraps of paper. I wish I had been more organized with my recipes from the beginning.
Exercises with Baby
So I have turned to jerry-rigging exercises that involve JT. He is my natural weight set. He is constantly getting a little heavier each day - no need to buy new weights. I have been doing two specific exercises. I call them the Baby Lift and Baby Squat. I do them in sets of ten.
Baby Lift consists of lifting John up over my head in a slow controlled manner. He loves flying in the air. I usually tell him he is a frog jumping, or a kangaroo, or a spaceship taking off with the appropriate sound effects. Lots of smiles.
Baby Squat involves holding John cross cradle and doing controlled squats. Well sometimes I change up the timing so it is a surprise to him. He provides a fantastic laugh track while I do them. A good incentive right?
Maybe someday I will have time to get in a real workout.