Cookbook

I can finally say it - my cookbook is completed.  I will not say it is finished because I am constantly on the lookout for new recipes.  But my recipe format and system of organization is finally in use.  By logging all my recipes in MacGourmet - I know that I currently have 73 recipes that I have made, we have enjoyed, and I plan to keep in rotation.  I am excited to grow that number whenever I can.

As for the filing system - all the recipes are being housed in a magnetic closure binder with two recipes to a page protector.  I purchased these colorful Avery Big Tab Folder Dividers.  One side of the folder holds potential new recipes that I have found and the other side holds recipes I have tried, liked, and have reformatted.  I really like my new system.  Only thing that makes me sad - is the pathetic white binder it is all in.  For now though, it works and it makes finding my favorite recipes a heck of a lot easier.


Sweet Potatoes

Earlier this week, JT had his first real food - apples.  The faces he made were quite hilarious.  I actually wished I had video taped his response instead of trying to get still pictures of it.

It has been 5 days with no allergic reaction to the apples.  So, I feel it is safe to move on to the sweet potatoes I had prepared.  This time I was ready - I got out my little flipvideo hd video camera to capture JT's response.


I suppose the reaction is not nearly as shocking as the apples.  The sweet potatoes were nice and sweet but not even close to the apples on the sweetness scale.  Since they (potatoes) are not very juicy like apples, I had to offer a bottle of water along with this meal.  JT did very well with it.

Mental note - if we ever have another child, I think it would be better to start with sweet potatoes first.  Then move to the apples.  No, there are no thoughts of adding another to the brood.  JT is more than a handful for me.

I think I will be taking more videos in the future.  JT is doing a lot more squirming so regular still shots are becoming more difficult.  Enjoy your weekend!

An Apple A Day...

Haha, is not what I follow.  Unlike his awful mother, JT will be experiencing a full range of fruits and vegetables.  I want him to get a healthy start and what better way than with apples!

This past Monday (Presidents Day) we embarked on this wonderful food journey.  For the past two weeks, we were enjoying our rice cereal prior to our lunchtime (noon) feeding.  On Monday, we pushed the cereal to right before our breakfast bottle - how apropos?  Cereal for breakfast.  For lunch, we dived right in to our first "real" food - the homemade apples.  I warmed up two apple "ice cubes" which is equivalent to about an ounce and a half of apples.


John was not a big fan during this first try.  The apples were good in my *I don't eat fruits* opinion but he has never had anything so sweet before.  So I get his misgivings.  We are now on to day 3 of apples and JT seems to be enjoying a heck of a lot more.  Can't wait to try something new later this week!

Homemade Baby Foods

Haha!  A crossover label post!  Cooking and JT together.  Insanity!

So, I spent part of this wonderfully long weekend trying my hand at homemade baby food. The first thing I needed to do was determine what would be good to try.  I had ordered a couple of books from Amazon and they all came to same general consensus.  All had apples, sweet potatoes, bananas, and peas as good first foods.

So it was off to the grocery store to pick up what I could find.  Now, I will be totally honest.  I feel weird in the produce section.  Stick me in the pasta/soup aisle and I am snug as a bug in a rug.  Produce though - weird.

It probably comes from a long standing aversion to fruits and vegetables.  I do not like the texture of many fruits and vegetables.  It has taken me a very long time to become okay with things like - broccoli, sweet potatoes, even beans.  Notice I did not mention any fruits - I still can not do fruits.  Fruit juice, I can barely stomach.  Fruits are a scary animal.

So I felt like a fish out of water in the produce section, picking out food that I can barely stomach but know would be the best things for my little boy.  I picked up a bunch of apples, a very large sweet potato, and some bananas (although I think the bananas may be eaten by the hubby before I get to smushing them up).

So I got to cooking my baby food.  I started with the apples.  I initially intended to steam all the fruits and veggies.  When it came right down to it, the microwave is here for a reason.  I just popped the apples (golden delicious) in for a few minutes until they became tender.  I then stuck them in my blender along with about a 1/4 cup of water.  Hit puree and let the blender do it's work.  In fact, I didn't even leave it on that long.  I have found that JT loves his cereal to be on the considerably lumpy side - so the apples were a bit lumpy.  Three apples were enough to fill my special baby food ice cube trays.

I cleaned everything to prevent cross contamination and got started on the sweet potato.  Ugh!  The directions said to peel and chop the little son of a gun.  Never again.  Sweet potatoes are tubers that do not like being cut.  If John really enjoys it, I will probably try to cook it skin and all in the microwave, then scoop out the yummy insides while it is still hot.  I added about 3/4 a cup of water to the blender for the sweet potato puree.

Don't they look so pretty.  I am impressed with how easy it is.  You just need a little bit of time and patience.  Voila!  I have baby food for the next week or so.  Hopefully JT will enjoy them.

Next up - pears, peas, bananas, avocados, and carrots!

Valentine's Day Dinner

Yesterday, was the big day of LOVE!  To be honest, the hubby and I do not go all out on this "holiday".  He got me flowers and a little gift -
Oooo, Roses!
And I told him that I would make a yummy fantastic dinner and dessert.  I did not tell him until he came home yesterday that the recipe for dinner was totally new.  So we might be up a creek without a paddle if I messed this up royally.  Luckily, I was not disappointed.  I actually tried out the Crockin' Girls prescribed recipe for this very occasion.

Slow Cooker Tilapia with Garlic Cream Sauce and Asparagus
Ingredients:
½ cup mayonnaise
1 ½ tbsp. garlic, minced
¼ cup parmesan cheese
4 - 6 tbsp. lemon juice
½ - 1 tbsp. Italian seasoning
4 - 6 tilapia filets, thawed or frozen
1 bundle asparagus
4 - 6 foil, about 12 inches in length
1 box wild rice, cooked
Steps:
1. Mix the mayonnaise, garlic, parmesan cheese, lemon juice, and Italian seasoning together in a bowl.
2. You will need a piece of foil per filet. Divide the asparagus into equal amounts per fish.
3. Place a spoonful of cream sauce onto the foil packet. Place the fish filet on top. Put another spoonful of sauce on top of the filet. Then place the asparagus on top of the filet.
4. Fold the sides of the foil over the fish, and then the ends of the foil to form a packet. The fish and asparagus should be completely wrapped in foil.
5. Place the packets in the slow cook stacked on top of each other. Cover and cook on HIGH for 2 hours if fish is thawed or HIGH for 3 hours if fish is frozen. Serve over rice.

The Final Product:
My recipe is slightly different from the Crockin' Girls original, in that I added our family favorite Penzey's Italian Herb Mix to the Sauce.  I tasted the sauce before creating my packets and it just needed a little something extra.  My fish was starting to thaw, so I put it on HIGH for 2 and a half hours.  What I found, when I opened the slow cooker up, was the packets on the bottom were a bit more well done that I would have liked.  So next time, I think I will rotate the packets at the halfway mark for more even cooking.

And for dessert, I chose to make some Zeppoles.  I whipped out the deep fryer, some peanut oil, and mixed the dough ingredients about 15 minutes before we were going to sit down to eat.  This way the dough could rise while we were enjoying our meal.  The recipe for the Zeppoles comes the fantastic Sopranos Family Cookbook. 

Zeppoles
Ingredients:
1 cup water, warm
1 tsp. active dry yeast
1 tbsp. sugar
2 cups flour
1 tsp. salt
peanut oil
confectioners' sugar
Steps:
1. Sprinkle the yeast and sugar over the water in a measuring cup. Stir until the yeast dissolves.
2. In a large mixing bowl, combine the flour and salt. Add the yeast mixture and stir until well blended. Cover with plastic wrap. Let rise in a warm place for 1 1/2 hours.
3. Pour about 2 inches of oil into a deep heavy saucepan or deep fryer. Heat the oil until the temperature reachers 375 on a deep-frying thermometer, or a drop of dough slipped into the oil sizzles and turns brown in 1 minute.
4. Drop the dough by tablespoons into the hot oil. Do not crowd the pan. Cook the zeppole until golden brown and puffed, about 2 minutes. Remove the zeppole with a slotted spoon and drain them briefly on paper towels. Repeat with remaining dough.
5. Put the zeppole in a paper bag, add the confectioners' sugar, and shake them well until coated. Serve immediately.

The Final Product:
I didn't realize until yesterday that it had been over 2 years since I made zeppoles.  They were fantastic.  They always take me back to New Jersey and church fairs or state fairs or...you know, really any fair.  They are not the same as elephant ears or funnel cakes.  They are .... oh goodness, just YUMMY!  And yes, between the hubby and I, we devoured all of those zeppoles.  This is just one of those recipes I am so glad I learned how to make - it transports me back home wherever we happen to be stationed.

So all in all, we had a nice Valentine's Day evening in.  It makes me all warm and fuzzy inside when you look across the table and see
the two loves of your life.  I wouldn't have it any other way.

Mr. Grabby Hands

About two weeks ago, I started noticing that John was beginning to use his hands a lot more.  Using his hands for things other than sucking on his thumbs.  Unfortunately, regular pictures do not capture this so well.  So here is a bit of a video dump of my now, Mr. Grabby Hands!  (I tried to put these in chronological order - so you can see how adept he has become.)

John is starting to talk to the guy in the mirror and way his hands at the little lamb.

This was one of the first experiences in the Exersaucer!

Toys can go in mouths too!

John is trying to reach for his orange Tigger teether.

Trying out his Bumbo seat while Silvio watches.

Shaking his rattle but wishing it fit in his mouth.

Last one, JT doing an interpretive dance with his teething keys.

Hope you all are enjoying your Valentine's Day!

Strombolis

This is the story of yesterday's dinner.  I had a bag of frozen pizza dough but did not quite want pizza.  It is a weird feeling but there it is.  Hubby kept saying make pizza.  A stroke of genius struck.  Why not try making a stromboli?  All it is is rolled up pizza.  Can't be too difficult, can it?  So here it is...

Stromboli
Ingredients:

Pizza dough
flour, for dusting
1 ball mozzarella cheese, sliced
1 cup filling, of each pepperoni, sausage, ham, olives, onions, whatever
olive oil, for brushing
sauce, for dipping

Steps:

1. Prep all filling ingredients.
2. Dust surface with flour and transfer dough to surface. Cut dough in half.
3. Roll out the dough into a rectangular shape - around 11 by 14 inches. The dough should be about 1/8 to 1/4 of an inch thick. Do this for both pieces of dough.
4. Cover the dough rectangle with your cheese and then your fillings. Make sure to leave a 1 inch border on all sides.
5. Evenly roll the stromboli from bottom to top. Pinch the seam tightly with closed fingers. Pinch the two ends closed and tuck them under the loaf. Carefully lift the loaf and place them seam side down on a parchment lined baking sheet. Brush the loaves with olive oil and cover the pan with plastic wrap.
6. Let the stromboli sit for 1 1/2 hours. The dough will be showing signs of wanting to rise.
7. Heat oven to 400 degrees. Brush the dough with olive oil and lightly sprinkle with salt. Cut 3 or 4 steam vents in each stromboli to release any air. Bake 20 - 30 minutes until crust turns golden. Rotate the pan after the first 10 minutes for even baking. Let cool for 5 minutes before serving.

The final product:

This recipe made two strombolis and perfect dinner size for the hubby and I.  As you can see I had a bit of seep-age occur.  I think that was because I cut really big vent slices.  I won't do that again.  I ended up leaving them in the oven for 25 minutes but next time I think it will stay in the oven the full 30 minutes.  It was a bit work intensive to roll out the dough but cold dough is easier to work with compared to fresh warm dough.

As for taste, totally yummy!  I used the mozzarella cheese, leftover meaty spaghetti sauce, and some pepperoni.  But really I think you could put almost anything inside - I thought it might be interesting to do one with cheese, pesto sauce, and cooked shredded chicken.  Maybe next time.

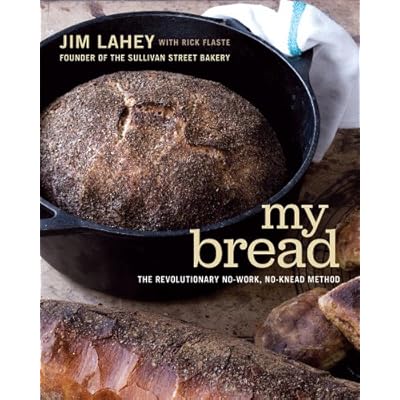
As for the pizza dough, I make a fresh batch following the instructions in My Bread: The Revolutionary No-Work, No-Knead Method.
The batch produces dough for two pizzas - which I freeze.  So this dough would produce about 4 adult sized strombolis. One could probably go a bit smaller in size and make a bunch from one batch - somewhat like Hot Pocket sized.  Probably a bit healthier than a Hot Pocket though.

Enjoy!

Slow Cooker Mac and Cheese

I have had a hankering for macaroni and cheese for a few days now.  I did not want the standard blue box kind of mac and cheese.  I also wanted it to taste kind of like Cheeseburger Macaroni Hamburger Helper - sans the Hamburger Helper box.  I looked around at a bunch of mac and cheese slow cooker recipes - so this one is a bit of an amalgamation of what I found plus what I had in my pantry.

Slow Cooker Mac and Cheese
Ingredients

1 lb. ground beef
½ lb. pasta, fusili, campanelle, good twisty pasta to capture the cheese
16 oz. Velveeta cheese, cubed
1 cup shredded six cheese mix
handful pecorino romano, grated
2 eggs, large, lightly beaten
12 oz. evaporated milk, (1 can)
1 ½ cups milk
1 tsp. salt
½ tsp. pepper
½ tsp. Worcestershire sauce

Steps

1. Brown the ground beef and place in slow cooker.
2. Mix together evaporated milk, milk, and eggs.
3. Combine cheese, pasta, milk/egg mixture, salt, pepper, Worcestershire, and beef in slow cooker. Mix well.
4. Cover and cook on High for 1 hours, stirring occasionally (I did once every 15 - 20 minutes). Reduce heat to Low and cook for another 30 minutes (more stirring here).

My apologies for not providing a picture.  It was quite yummy.  It was good enough for the hubby to say - keep this one!  Good enough for me to no longer have my mac and cheese/ hamburger helper craving.  I know it isn't a traditionally long cooking slow cooker recipe but I think the melting cheese makes the long cooking time nearly impossible.  Since my slow cooker has a non stick insert I did not have and issue with cheese hardening on the side.  But if I was using my old crockpot I would definitely advise spraying the sides with PAM or rubbing the insert with butter before cooking.

Foodie Love

I have been having a ball lately. My friend Suzy and I have been sharing our recipes at another blog: RecipeShuffle. Each week we Shuffle off a recipe for the other to try. We are starting out with some of our home favorites before we move on to other recipes. The great thing about it is that I get a chance to feel so much closer to someone who I miss a heck of a lot. There are a lot of days where I do not leave the house, mostly because of John. A whole boatload of days where I really despise Kansas because it is so gosh darn far away from our families. Our closest family is just over a 12 hour drive away. But when I get my recipe to cook for the week, I feel so excited to get to share food, albeit not in the normal "dinner party" sort of way.

Fortunately, Suzy teaches English, so she is infinitely better equipped to describe this feeling then I am. So check out what she wrote on her blog: BurghBytes.

Favorite Time of Day

This probably seems silly now. But it feels good to say out loud, or well, write out loud. John still has some digestive issues. Feeding time is shortly accompanied by a screaming spell. If I have the patience to wait it out, I get a wonderful sleepy boy to hold. While this has been fairly normal, John is now showing signs of being, like an actual little person. He actually gets all close and wants to snuggle in with me. It makes me feel great - even after the screamfest. Now when we get rid of the screamfest and go straight to cuddle baby time - I will be feeling grand!